설명
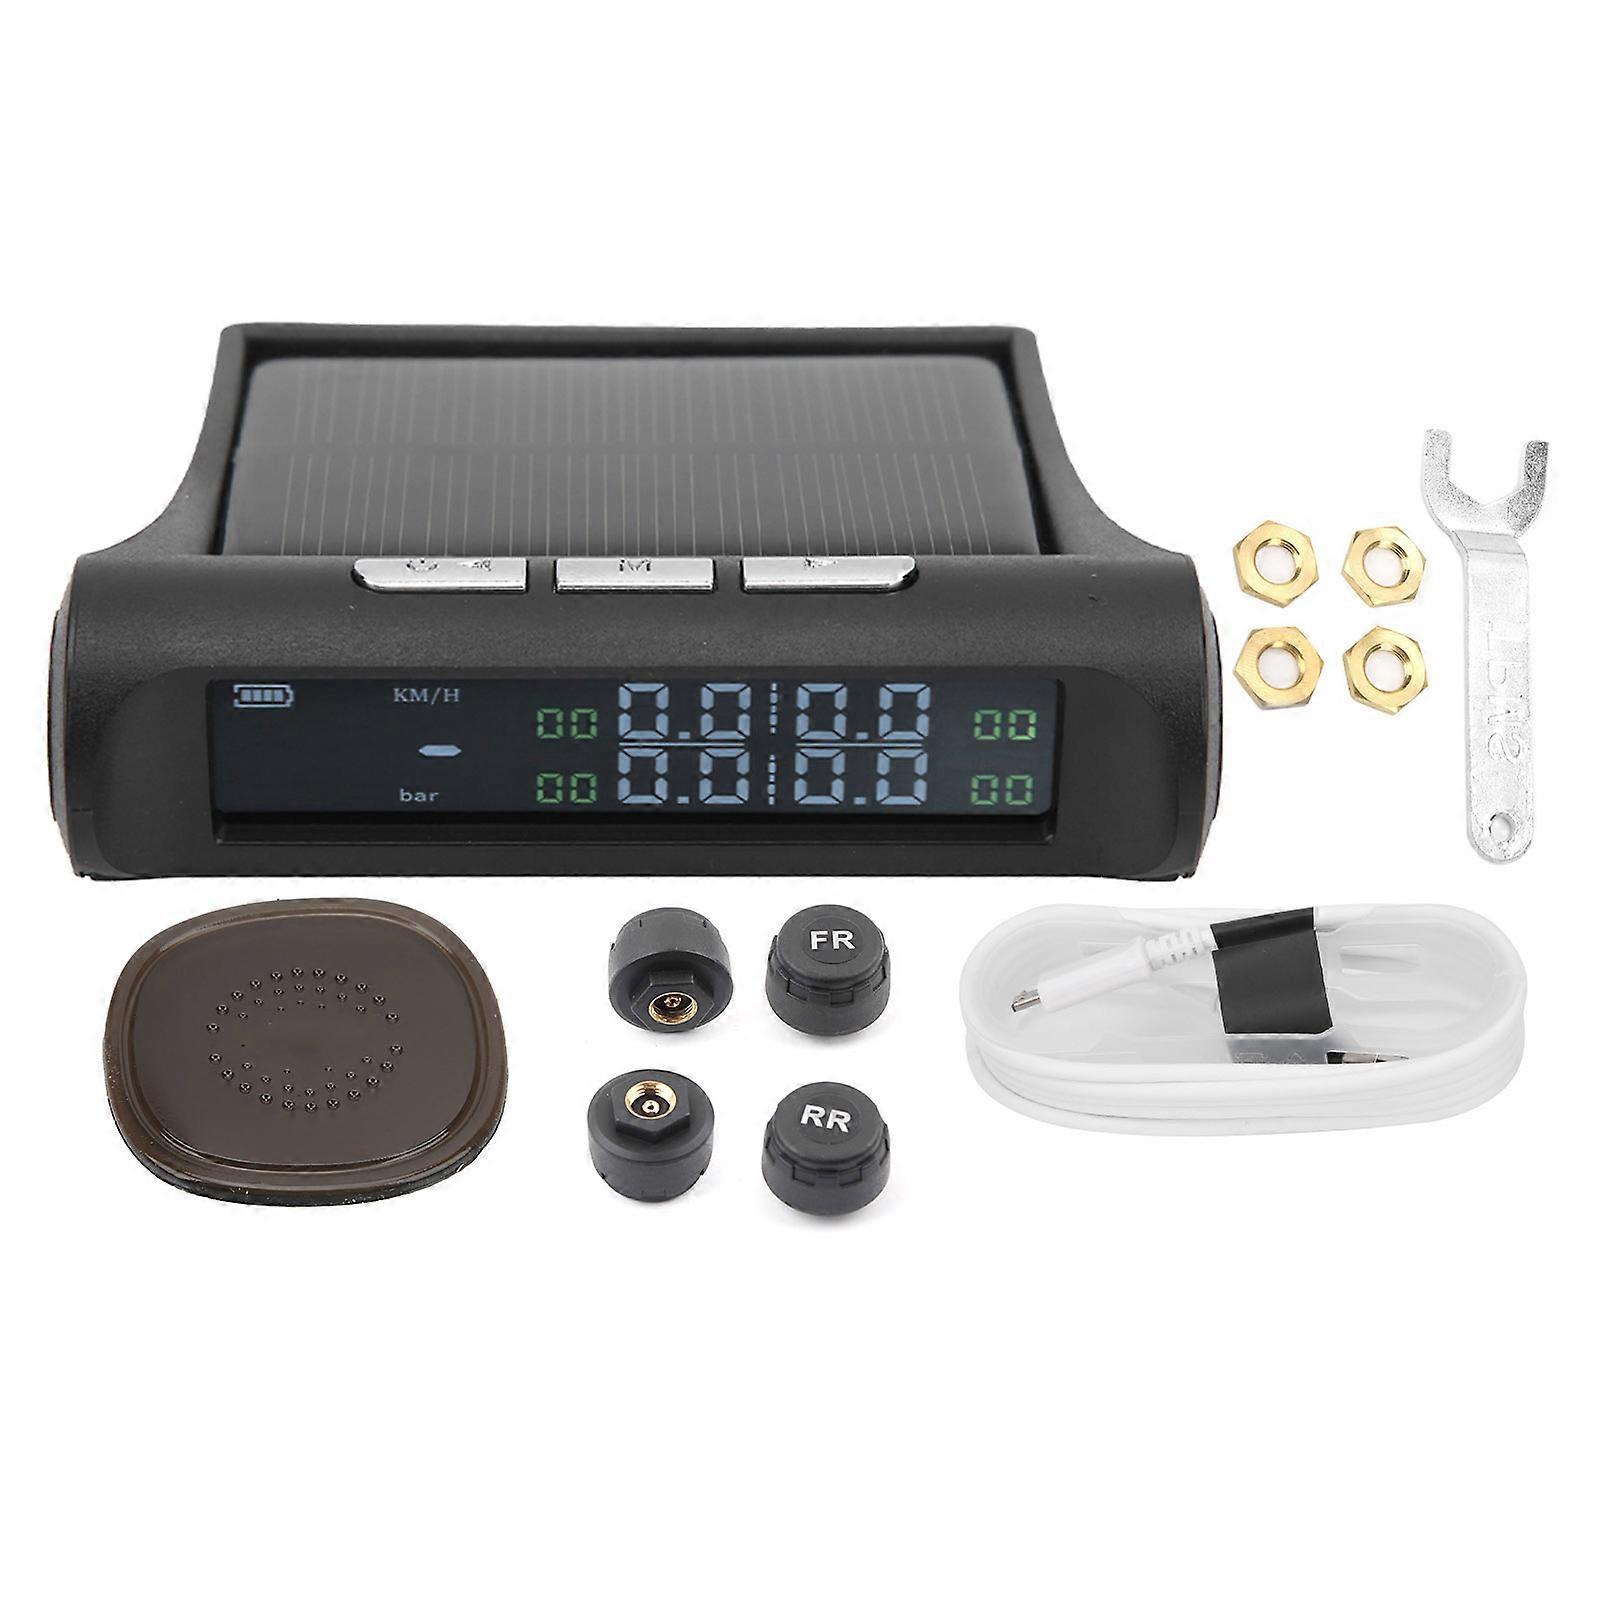
Feature 1The headup display of the car is combined with the two functions of the tire pressure monitoring system. It can not only drive without lowering the head, but also pay attention to the dynamics of the vehicle at any time. At the same time, you can also see the status of the vehicle tires and tire pressure monitoring. 2The system adopts LCD color screen display, which is clear at a glance and can be seen more clearly, and is perfectly integrated with HUD. 3Alarm function, including tire leak alarm, tire low pressure alarm, tire high pressure alarm, tire high temperature alarm, tire sensor low battery alarm. 4It has solar charging function, MTK highperformance GPS module, cool mini body design, compact and does not take up space. 5Support display GPS, vehicle speed, altitude display, satellite time, car temperatureItem Type: Solar Tire Pressure MonitorMaterial: ABS+PCPower Supply: DC 5VWorking Temperature: -40-80Fitment: UniversalBattery Type: Lithium batteryBattery Model: 503030Battery Capacity: 400mAh (built-in battery)Host Size: Approx. 9.4x2.8cm/3.7x1.1inKey Description: Left is the back buttonM is the menu keyRight is the forward keyInstallation Steps: Receiving Host Installation: Take out the receiving host, and then fix the receiving host with a non-slip mat in a suitable position on the instrument panel to prevent it from falling.When using this product for the first time, first check whether it has electricity. If there is no electricity or it does not turn on, you must take out the USB cable and connect it to the USB port in the car for charging. After it is fully charged, it can be charged by solar energy without connecting the USB.Tire Pressure Sensor Installation: 1. Screw in the gasket first2. Tighten the sensor3. Tighten the gasket counterclockwise to hold the sensor4. Tighten the sensor and tighten it counterclockwise with a wrenchTire Pressure Sensor Pairing: 1. Long press the M button to enter the setting, press the back button twice, then press the M button once to enter the flashing state, and then press the back button and the forward button at the same time for 5 seconds to enter the tire pairing2. Twist Down The Tire Valve Cap After Installing The Sensor, keep the air pressure between 0.7-1.5 Bar, and inflate or deflate the tire. The bottom row of the display shows a number to prove that it is matched ( The corresponding numbers represent: 0 left front wheel 1 right front wheel 2 left front wheel 3 right rear wheel) Long press the "M" key to save.Introduction of Receiving Host Opening/Closing and Key Functions: 1. On/Off buttonIn the shutdown state, you can choose to press the "back button" of the receiving host to start the system;In the power-on state, if you want to shut down, you can only choose to long press the "back button" to shut down.2. M keyIn the normal working state of the receiving host, long press the "M key" to enter the "menu and settings".In the setting, it is also the "Select and Confirm" button.3. Forward buttonLong press the "forward button" for 5 seconds to switch between HUD mode and TPMS tire pressure monitoring modeIn the setting, it is believed that "Add" KeyThe brightness of the display can be increased in the boot state4. Back buttonIn the normal working state of the receiving host, long press the "back button" for 5S to turn off the hostThink of it as the "decrease" button in the settings.The display brightness can be reduced in the power-on state
.wang-edit-text{
font-family:'Arial' !important;
}
.wang-edit-text table {
border-top: 1px solid #000;
border-left: 1px solid #000;
}
.wang-edit-text table td,
.wang-edit-text table th {
border-bottom: 1px solid #000;
border-right: 1px solid #000;
padding: 3px 5px;
}
.wang-edit-text table th {
text-align: center;
}Package List1 x Host1 x Data Line4 x Sensor1 x Wrench4 x Metal Gasket1 x Anti-Slip Mat1 x ManualNotePlease note that the new type and old type of this product will be sent randomly, and make sure you will not mind before ordering.
-
브랜드:
Unbranded
-
카테고리:
차량 정비
-
Fruugo ID:
308204630-690103842
-
EAN:
7987249656027