설명
Feature:
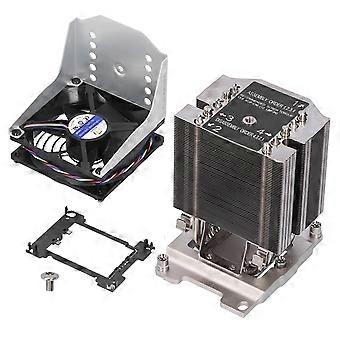
1. SNK‑P0070APS4 4U active CPU cooler, fit for X11 Purley platform.
2. Support the installation mechanism of narrow support plate, easy to install and use.
3. CPU processor dedicated heat dissipation, suitable for tower server LGA3647 interface.
4. Effectively reduce temperature generated by the CPU during operation and prolong the service life of computer.
5. The fan revolving speed is PWM1200‑2800RPM, low noise, stable and reliable performance.
Specification:
Item Type: CPU Cooler
Material: Metal
Model: SNK-P0070APS4
CPU Type: LGA3647 (Rectangular Motherboard)
Voltage: 12V
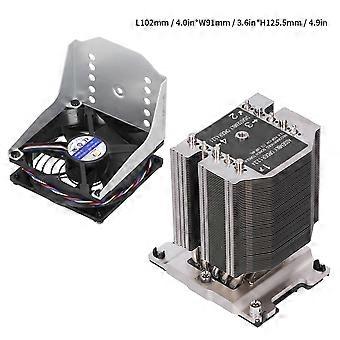
Product Size: Approx. 102x91x125.5mm / 4.0x3.6x4.9in (LxWxH)
Fan Speed: PWM1200-2800RPM
Noise Value: 33.2dBA (Maximum)
Air Volume: 53.26CFM (Maximum)
Fan Plug: 4 Pin PWM
Bearing Type: Double Ball
Number of Copper Tubes: 5
Power Consumption: 205W
How to Use:
1. Before operation, please wear ESD gloves to protect the processor and CPU socket.
2. Confirm whether the processor has fabric. If there is no fabric in the recess, can directly snap the carrier BKT-0126L into the processor by aligning the triangular sign between the bottom of the processor substrate and the carrier. If the processor has fabric, use a cutter to remove the non-fabric processor support bracket on the bracket, and then snap the modified bracket into the fiber processor.
Note: The bracket latch must be full engaged with the key slot on the edge of the processor sub-state, and the processor should be firmly fixed on the bracket after successful insertion.
3. Face the bottom of the radiator and remove the thermal grease protective cover of the radiator. The required thermal grease has been pre-applied on the bottom of the new heat sink. Make sure that there is no contamination on the thermal grease.
Note: The cooperation between the bracket and the backing plate controls the direction of the heat sink installed on the motherboard. First check the required heat sink orientation on the motherboard, and then insert the processor tray subassembly into the heat sink in the required orientation.
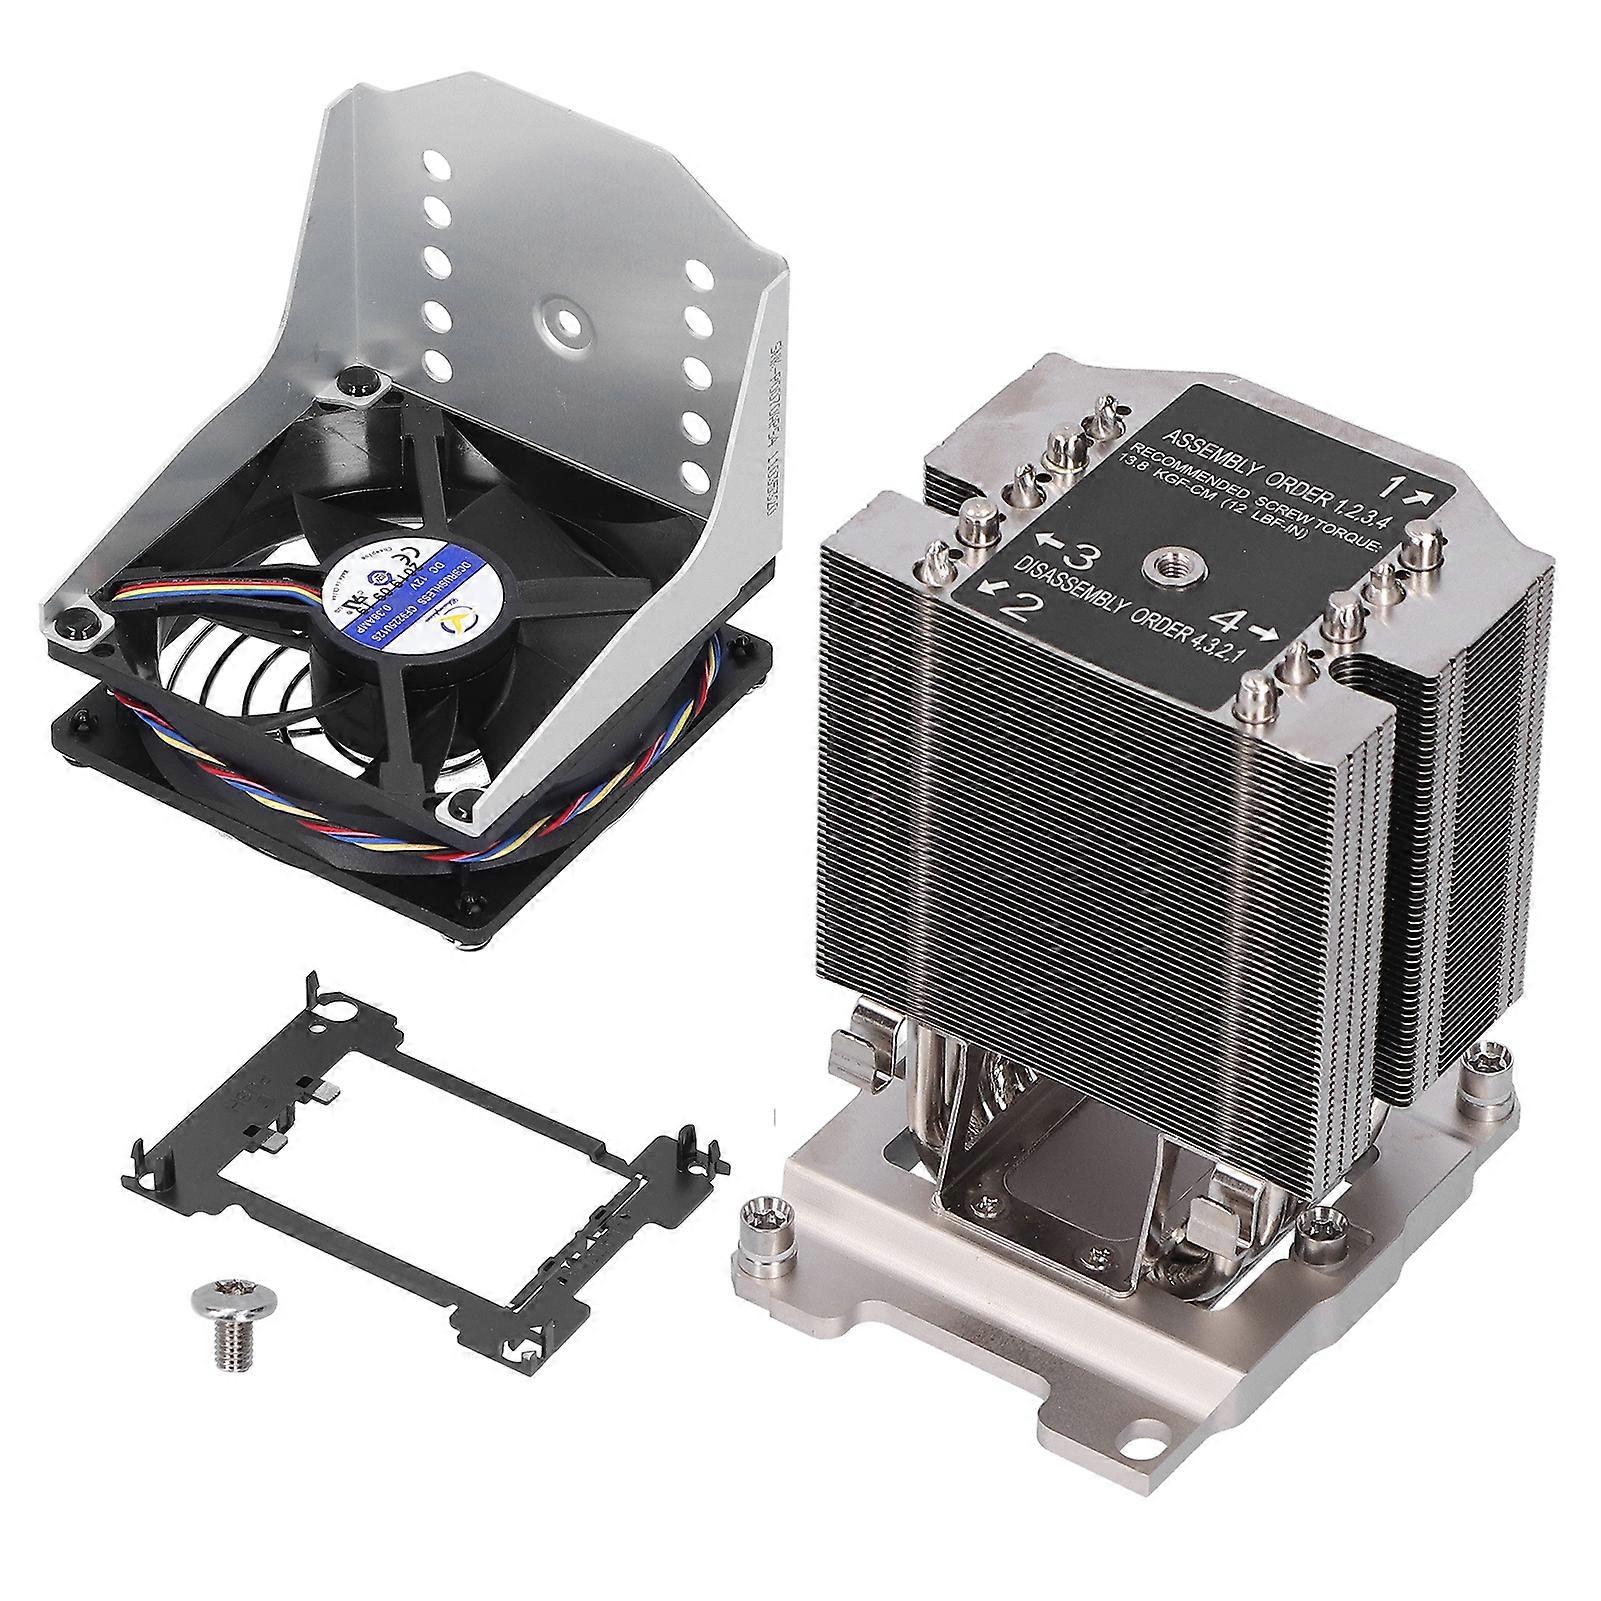
4. Place the hollow triangular sign on the bracket toward the chamfer of a corner of the radiator base. Then, align the two diagonally aligned partial posts on the bracket with the corresponding two guide holes on the radiator base. At the same time, the other two diagonal latches on the bracket should be connected to the corresponding edges of the core on the base of the heat sink.
5. Make sure that the alignment posts and latches on the bracket are in the correct pre-engagement position with the radiator base. Press the processor tray subassembly down onto the heat sink. All aligned partial rods and latches on the bracket must be fully engaged with the heat sink base. Ensure that there is no contamination on the processor LGA pad.
6. Remove the dust cover of the CPU socket. Align the white triangular keys on the bracket with the triangular sign printed on the printed circuit board and pad. Then put the PHM on the pad. The two guide posts on the backing plate must pass through the two post alignment holes on the radiator base.
7. Tighten the PHM on the backing plate in accordance with the assembly sequence printed on the assembly and disassembly label 1-> 2-> 3-> 4. Each screw should be screwed all the way down and full tightened in one operation. In order to achieve a full tightened state, each screw should not be tightened repeatedly. The screwdriver must be equipped with a T30 bit and set the tortion to 13.8kgf-cm (12lbf-in).
8. Install the radiator cooling fan and bracket assembly on the radiator body, and make sure it is fully engaged with the radiator body. Then, tighten the single fixing screw on the top of the fan bracket to the body of the radiator. Finally, plug the cooling fan connector into the 4-pin fan header on the motherboard.
.
Package List:
1 x Cooler Base1 x Cooler Fan1 x Bracket1 x Manual1 x Screw
Note:
1. Please allow 0‑1 inch error due to manual measurement. Thanks for your understanding.2. Monitors are not calibrated same, item color displayed in photos may be showing slightly different from the real object. Please take the real one as standard.
-
Fruugo ID:
414041782-874838146
-
EAN:
7908770579678
제품 안전 정보
아래에 설명된 이 제품과 관련된 제품 안전 정보를 참조하십시오.
以下の情報は、この製品を販売する独立したサードパーティ小売業者によって提供されています。
제품 안전 라벨

안전 경고:
Warning: Please read the product instructions carefully before use to ensure correct use.
일련번호:
7908770579678