설명
Hard Drive Head Replacement Comb for Tip Stacking Assembly HSA Repair Tools Kit 2.5/3.5in
Features:
1.This hard drive head replacement comb is suitable for built?in 2.5/3.5in hard drive, which is quite practical.
2.Any head replacement or component replacement by disassembling the hard drive must be performed in a qualified clean environment.
3.The following operations are divided into two categories: hard drives with an internal parking area and hard drives with an external parking area.
4.Head replacement refers to the replacement of the entire head stack assembly (HSA), rather than partial replacement of the HSA.
5.High quality material can make sure the durability and stability of the product.
specification:Item Type: Hard Drive Head Replacement Comb
How to Use:
1. Unloading Head Of Hard Drive With Internal Parking Area:
Step 1: Disassemble the hard drive in a clean room environment.
Step 2: Remove the HSA power socket.
Step 3: Remove the short partition frame. (Very few drives have this drive)
Step 4: Remove the top magnet and HSA brake of the voice coil motor or VCM.
Step 5: Press the coil of the VCM with the fingers of the left hand, and evenly rotate the motor counterclockwise with the fingers of the right hand until the edge of the disc is 1 mm. This process should be completed at one time to avoid the possibility of the magnetic head being stuck. Platter.
Step 6: Observe carefully, and gently move the hollow part (head comb) of the head replacement tool kit into the head arm. The most important thing is to keep a proper distance between the head arm and the actual reading. Do not move the head comb directly to the slider area, which can easily damage the head. Then, continue to rotate the motor with the left hand to move the magnetic head out of the disc, so that the magnetic head arm can completely enter the magnetic head comb, while the magnetic head remains intact and moved out of the comb.
Step 7: Adjust the position of the head replacement tool kit (head comb) so that we can fix it with the head arm by inserting the locking pin into the mounting point at the end of the head arm.
Please Note: Improper or rude operation may distort or even damage the HSA.
Step 8: Loosen and remove the screws, and then remove the HSA.
2. Mounting Head Of Hard Disk Drive With Internal Parking Area:
Step 1: Repair the HSA and related components of the head comb, and separate the head.
Step 2: Use your right hand to gently push the head replacement tool kit (head comb) into the platter until it cannot be moved.
Step 3: Press the coil of the VCM with the fingers of the left hand, and then rotate the motor counterclockwise with the fingers of the right hand until the magnetic head is moved to the internal parking area.
Please do not operate rudely, quickly or intermittently!
Step 4: Install the HSA brake, the top magnet of the VCM and other components.
3. Unload The HSA Of The Hard Disk With External Parking Area:
Step 1: Disassemble the hard drive in a clean room environment.
Step 2: Remove the HSA power socket.
Step 3: Gently push the head replacement tool kit into the head arm, and then move the head to the edge of the platter. No head contact is allowed during this process. If you can do this in this step, you can fix the hair comb and the head arm by locking the pins, otherwise, continue to the next step.
Step 4: Remove the top magnet of the VCM and HSA brake. (For Hitachi drives, sometimes it is not easy to delete the VCM component, please pay more attention at this time)
Step 5: Gently move the head arm and adjust the position of the head replacement tool kit (head comb) in the head arm, and then fix it by inserting the locking pin into the mounting point of the head arm. Gently move the head arm again to get it out of the parking area.
Step 6: Loosen and remove the mounting screws of the HSA, and then remove the HSA.
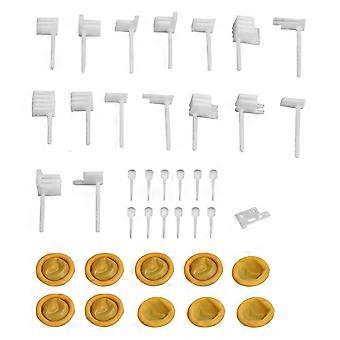
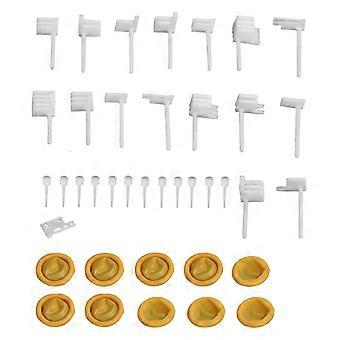
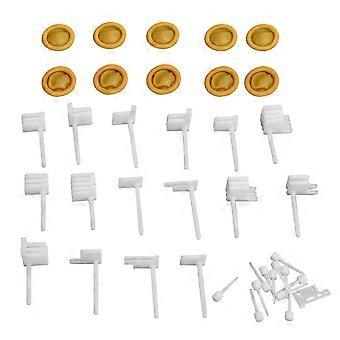
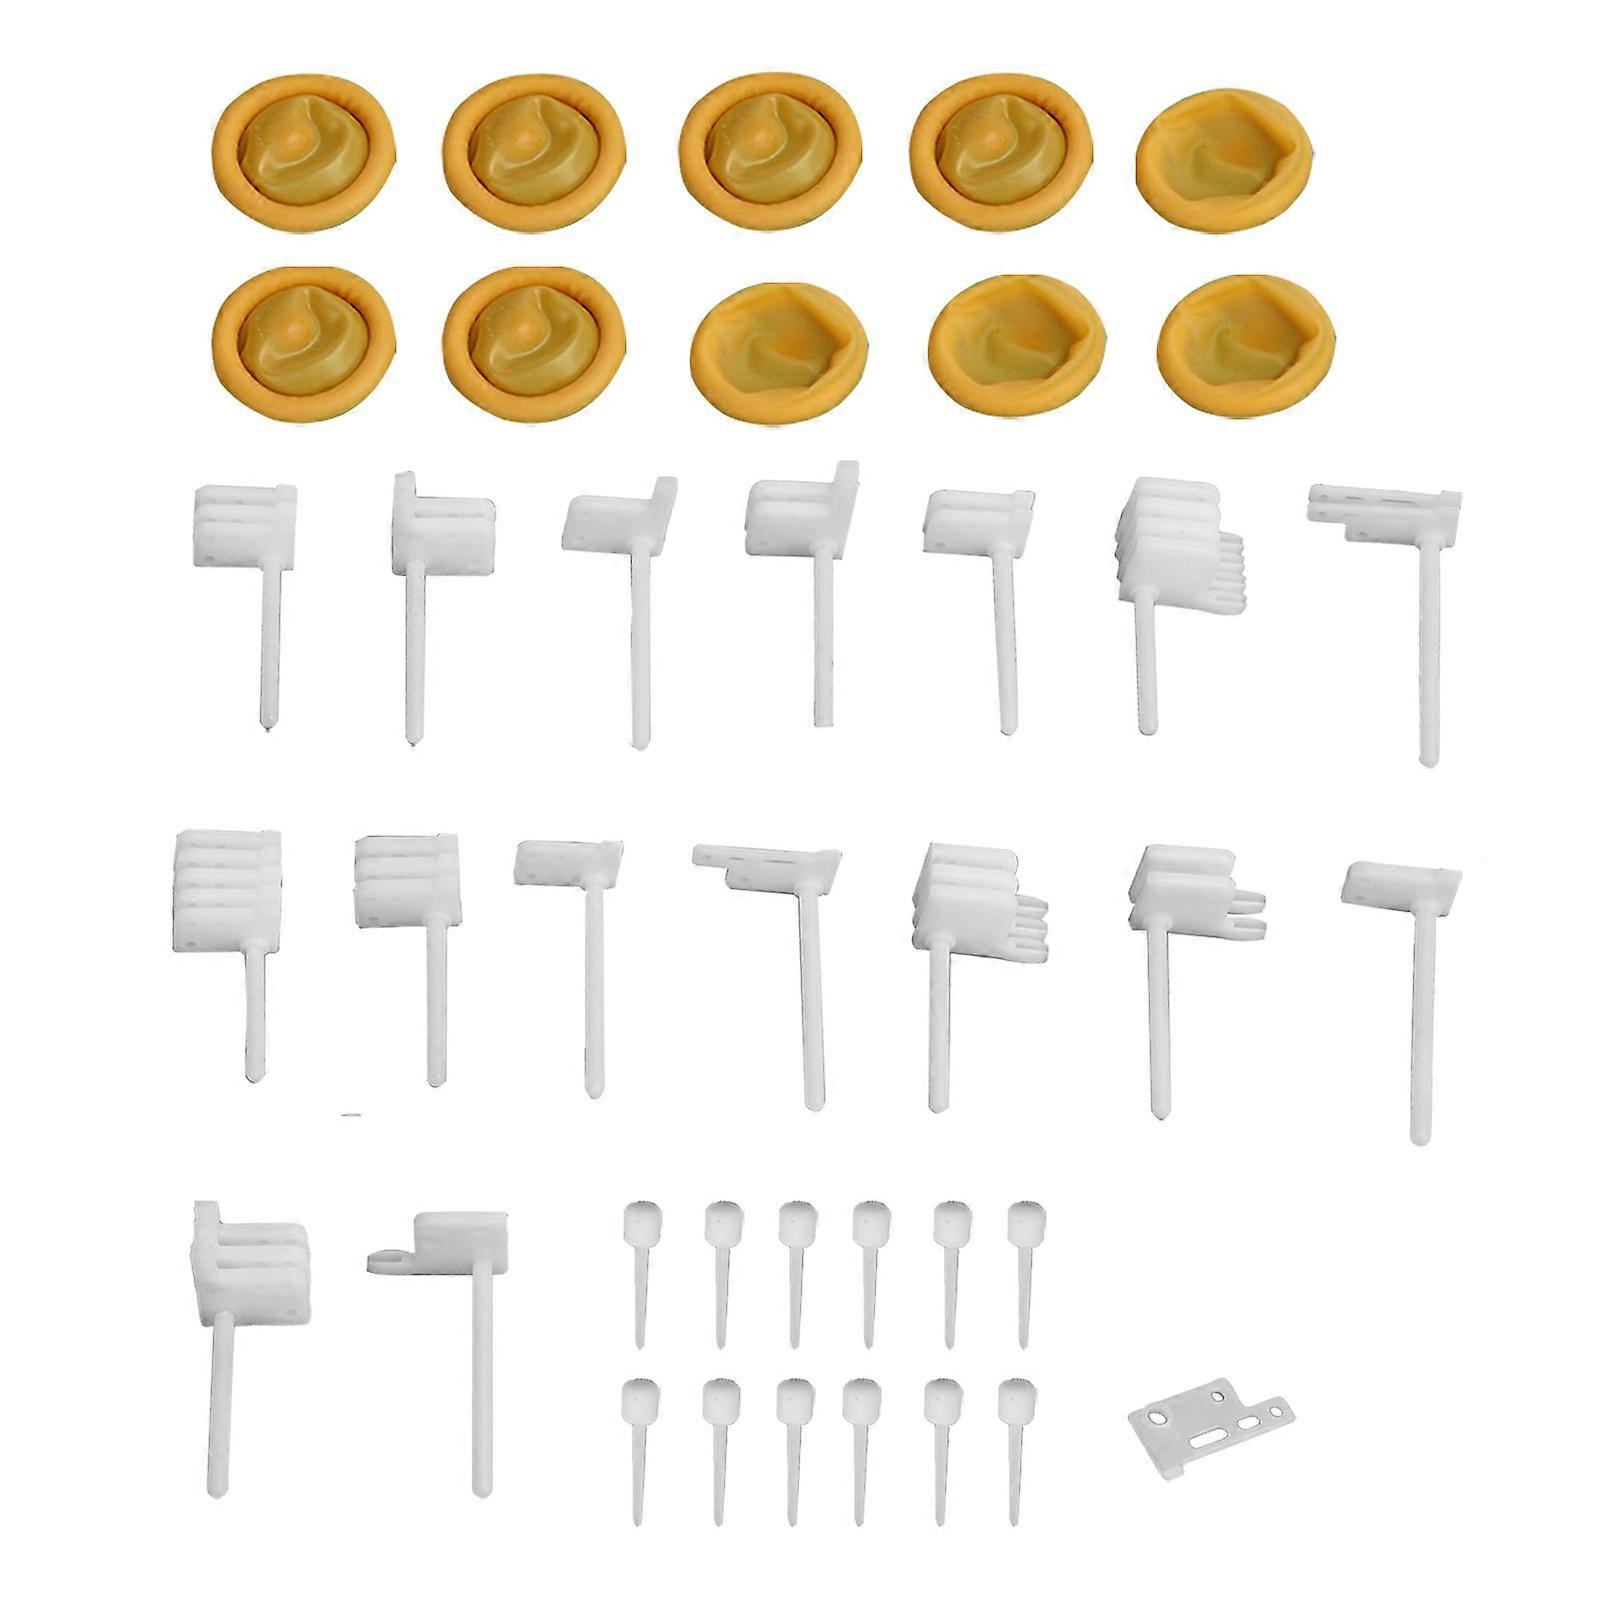
PackageList:1 x 101
1 x 10²
1 x 10³
1 x 10⁴
1 x 121
1 x 122
1 x 123
1 x 132
1 x 201
1 x 202
1 x 203
1 x 215
1 x 301
1 x 302
1 x 401
1 x 403
12 x Pin
1 x Gasket
10 x Ring Sleeve
-
브랜드:
Unbranded
-
카테고리:
망치 헤드
-
Fruugo ID:
310790823-694777231
-
EAN:
5940764278145