설명
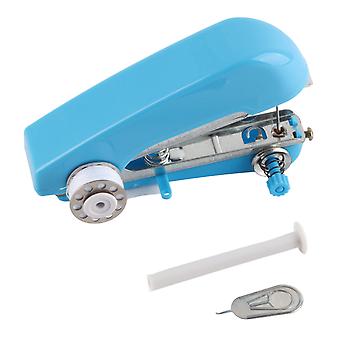
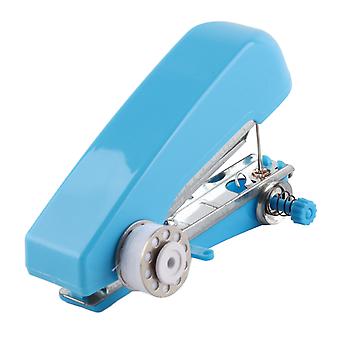
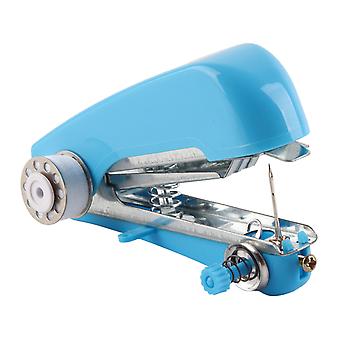
Handheld Sewing Machine Portable Mini Handheld Stitching Machine Automatic Feeding DIY Hand Sewer Machine for Household Blue
Features
1、Automatic Cloth Feeding: The manual sewing machine is simple and convenient to use and has various functions. It can automatically feed cloth, adjust the stitch distance, and connect the spare long rod with the bobbin to cover the large thread ball and thread. 2、Stainless Steel and Plastic: Mini sewing machine is made of stainless steel and plastic material, which is wear resistant and durable and can be used for a long time. 3、DIY Made: The quantity is sufficient to meet your DIY needs and daily use, and you can also share to your friends and family. 4、Scope of Application: The Hand sewer machine is not easy to fade, break, deform or rust, making it ideal for quick repairs or jobs that traditional desktop machines can't handle. 5、Simple Operation: The Sewing machine can be used indoors or outdoors to mend torn pockets without taking off your pants.
Specification
Item Type: Handheld Sewing Machine
Material: Stainless Steel, Plastic
Product Specification: 1 Piece
Product Use: Household
Scope of Application: Most Scenarios
Size: Approx. 10 x 7cm / 3.9 x 2.8in
Instructions:
1. Hold the machine: Hold the machine base with the four fingers of your right hand and place your thumb naturally on the top of the upper cover of the machine to hold the whole machine smoothly.
2. Threading: Gently pull out the thread from the spool. Through the lead chart A, and then introduce the clip wire adjustment piece
B. And then through the lead coil. C. The lead wire is temporarily placed following to the needle, the other threader from the front of the needle (to the body of the combination) through the needle hole, and then the thread is introduced into the threader small hole, exit the threader pull out the head line about 2 to 3 cm pressure plate can be used
3. Putting the fabric: lift the pressure plate with the index finger of the right hand, put the fabric prepare to be sewn (thickness not more than 0.8 mm) flatly under the pressure plate and gently put back the pressure plate to press the fabric.
4. Sewing operation: Hold the fabric with the left hand, gently and quickly press down the top of the upper cover with the right thumb to the bottom, then press down again with the thumb, and so on, and the fabric feeding mechanism automatically sends the sewn item out to the left. The right hand holding the machine gradually moves to the right, while the left hand holding the fabric gently moves the sewn object to the left with the sewing rhythm until the sewing is finished.
5. End: At the end of sewing, cut the thread with scissors and gently pull up the presser to remove the fabric. Pull out the last thread from the reverse side of the sewn fabric, put it into the following section of the loop and tighten it and tie a knot, the stitch will be firm.
6. The machine can automatically feed the fabric and adjust the tightness between the stitches, but it is necessary to pay attention to the following points.
A. The needle is too tight, the pressure nut will be slightly counterclockwise adjustment.
B. The pin is too loose, the pressure nut will be adjusted slightly clockwise.
The correct pin tightness is shown in the table below. If you need a larger stitch, the left hand can pull the cloth a little faster. If you need a denser stitch, the left hand can pull the cloth a little slower.
7. Change the thread group; if you change to a large thread group, you can connect the spare extension rod to the bobbin and set it into the large thread group. Place the spare plastic hat on the end of the rod to fix the large ball of thread, then rethread the thread and adjust the tightness of the thread before sewing; use 50 to 90 cotton thread or synthetic thread for good results.
8. Needle change: loosen the set screw and remove the broken needle. Install the new needle as shown, taking care to align the flat side of the needle with the fixing screw and not to install it in reverse. Needle type DHX 14.
Package List
1 x Handheld Sewing Machine
-
Fruugo ID:
358170885-778953151
-
EAN:
9308869398186
제품 안전 정보
아래에 설명된 이 제품과 관련된 제품 안전 정보를 참조하십시오.
以下の情報は、この製品を販売する独立したサードパーティ小売業者によって提供されています。
제품 안전 라벨

안전 경고:
Please do not allow your child to handle this product alone to avoid swallowing or other injuries; adult supervision is recommended.
재료:
0.02